Prepare Print File
-
sentiment_very_satisfied
Viewers:
- 0
How to Set Up and Prepare Print File
1. Understand Printer SpecificationsBefore you start designing, consult with your printer to understand their specific requirements. This includes: - File formats (PDF, TIFF, EPS, etc.) - Color mode (CMYK or RGB) - Resolution (usually 300 DPI for high-quality prints) - Bleed, trim, and safe area dimensions |
2. Choose the Right SoftwareUse professional design software such as Adobe InDesign, Illustrator, or Photoshop to create your artwork. These programs offer the necessary tools and precision for print design. |
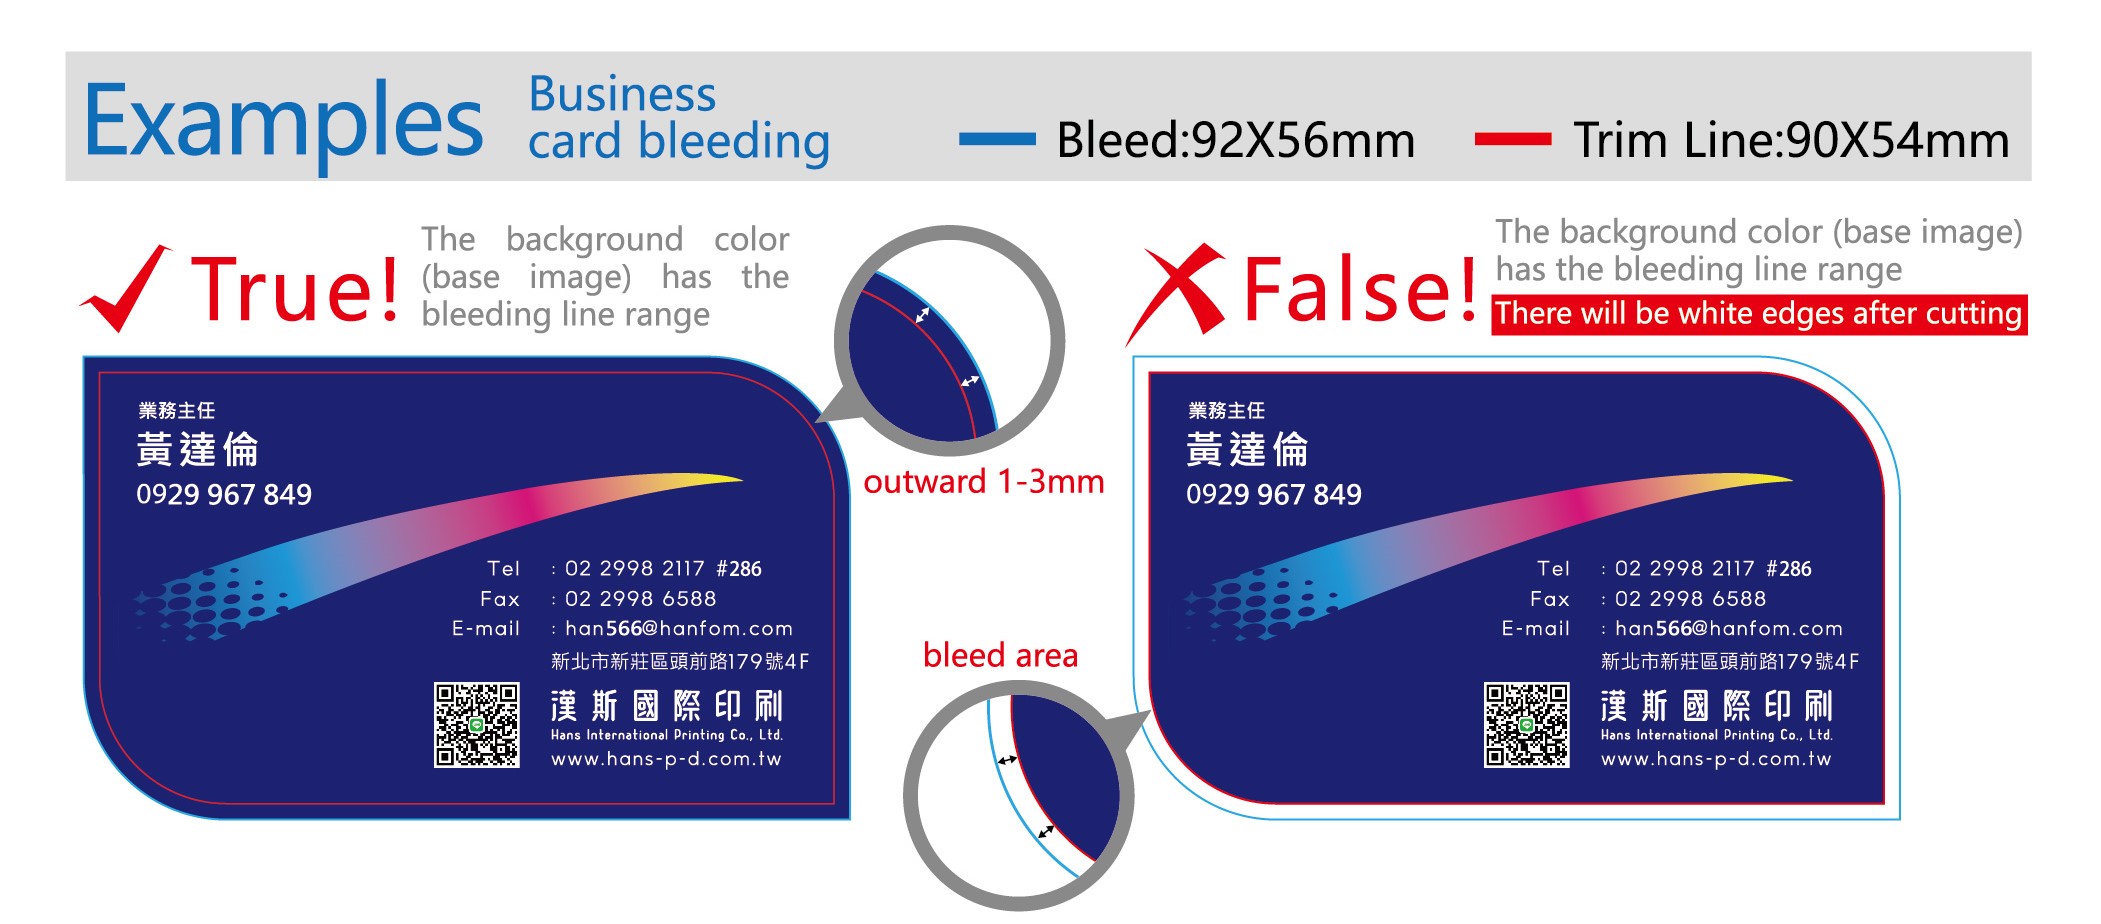
3. Set Up Your DocumentCreate a new document in your chosen software and set the correct dimensions, including: - Page Size: Match the final size of your printed material. - Bleed: Typically, add 0.125 inches (3 mm) around all sides for bleed. This ensures that no unprinted edges appear in the final trimmed product. - Margins/Safe Area: Keep important elements (text, logos) within the safe area, at least 0.25 inches (6 mm) away from the trim line to avoid being cut off. |
4. Use the Correct Color ModeSet your document to CMYK color mode. CMYK is used for printing, while RGB is used for digital displays. Converting RGB to CMYK later can cause color shifts, so start with CMYK to ensure color accuracy. |
5. Ensure High ResolutionSet the resolution to at least 300 DPI (dots per inch) for all images and graphics. Low-resolution images (less than 300 DPI) can appear pixelated or blurry when printed. |
6. Embed Fonts and ImagesEnsure all fonts are embedded or outlined, and all images are embedded or linked correctly within the document. Missing fonts and images can cause issues during the printing process. |
7. Check and Adjust ColorsPerform a final check of your colors to ensure they are within the CMYK gamut. Avoid using colors that are too vibrant in RGB, as they may not print accurately in CMYK. |
8. Add Crop Marks and BleedWhen exporting your file, make sure to include crop marks and bleed. Crop marks indicate where the document will be trimmed, and bleed ensures that the artwork extends beyond the trim line.
|
9. Proofread Your ArtworkCarefully proofread your document for any spelling, grammar, or design errors. Print a proof copy if possible to catch any issues that might not be visible on screen. |
10. Export as a Print-Ready PDFExport your document as a PDF using the “Press Quality” or “High Quality Print” settings. Ensure that the PDF settings include: - Crop marks - Bleed - Embedded fonts - High-resolution images |
FAQs
Q: What file formats are typically accepted for print-ready artwork?
A: Common file formats include PDF, TIFF, and EPS. Always check with your printer for their preferred format.
Q: Why is CMYK color mode important for printing?
A: CMYK is used for printing because it aligns with the four-color printing process (cyan, magenta, yellow, black). It ensures color accuracy in the final print.
Q: What is bleed, and why is it necessary?
A: Bleed is the extra area around the edges of your document that gets trimmed off. It ensures that the artwork extends to the edge of the page without leaving unprinted borders.
Q: How can I ensure my fonts are printed correctly?
A: Embed or outline all fonts in your document to ensure they print correctly, even if the printer doesn't have the same fonts installed.
Q: What should I do if my images are low resolution?
A: Use high-resolution images (300 DPI or higher) to avoid pixelation. If you only have low-resolution images, consider sourcing higher quality images or resizing them for better clarity.


